When it comes to insulating your home, choosing between faced and unfaced insulation can be a tough decision. While both types serve the same purpose of keeping your home warm in the winter and cool in the summer, they have distinct differences that can affect their performance. In this blog post, we will explore the pros and cons of faced and unfaced insulation so you can make an informed decision on which type is best for your home. Whether you’re a homeowner or contractor, read on to learn more about these two options!
What is faced and unfaced insulation?
Insulation is a vital component of your home’s energy efficiency. It helps to keep warm air in during the winter and cool air in during the summer. Faced insulation is a type of insulation that has a vapor barrier attached to one side, typically made from kraft paper or foil. This barrier helps control moisture levels within your walls and prevents it from seeping into your home.
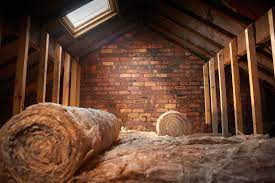
On the other hand, unfaced insulation does not have this vapor barrier and is often used for areas where moisture isn’t an issue, such as attics or crawl spaces. Unfaced insulation may be more suitable for homeowners who want to add additional layers of protection between their walls without adding extra bulk.
There are different types of faced and unfaced insulation materials available on the market today, including fiberglass batts, mineral wool batts, spray foam insulation, and blown-in cellulose. The choice you make can depend on various factors like budget constraints or specific needs for certain areas in your home.
Faced insulation comes with a paper or foil backing that protects against moisture while unfaced doesn’t have this layer; both types come in different materials that cater to varying needs dependent on budgetary restrictions or location requirements.
The pros and cons of faced insulation
Faced insulation is insulation that has a vapor barrier attached to one side. This can be made of paper, foil or plastic and it helps to prevent moisture from getting into your home’s walls. Here are some pros and cons of using faced insulation:
Pros:
– Faced insulation is easier to install because the vapor barrier is already attached.
– The vapor barrier helps to prevent mold growth by reducing moisture buildup.
– Faced insulation can improve energy efficiency by reducing air leakage.
Cons:
– If installed incorrectly, the vapor barrier can trap moisture inside your walls leading to mold growth and rotting.
– Faced insulation may not be suitable for hot climates because it can trap heat inside the wall cavity.
– The added cost of buying faced insulation compared to unfaced could make it less appealing for budget-conscious homeowners.
Faced insulation provides an effective way of ensuring moisture control in your home while also improving its energy efficiency. However, proper installation procedures must be followed for this type of insulation otherwise you risk causing more harm than good.
The pros and cons of unfaced insulation
Unfaced insulation, as the name suggests, lacks a facing or a vapor barrier. This means that it does not have any material covering its surface to prevent moisture from seeping through the walls. Here are some pros and cons of using unfaced insulation in your home.
Pros:
– Easy installation: Unfaced insulation is simple to install since you do not need to worry about aligning the paper backing with the studs.
– Cost-effective: Since unfaced insulation lacks a facing material, it can be less expensive than faced insulation.
– Breathability: It allows air to circulate more freely throughout your house, which can help reduce mold growth.
Cons:
– Not suitable for high moisture areas: Unfaced insulation cannot withstand high levels of humidity because it lacks an additional barrier against moisture.
– Prone to pests and insects infestations: The lack of a protective layer makes this type of insulation vulnerable to pest damage.
– Lower R-value: Without an extra layer acting as a barrier against heat loss or gain, unfaced insulations may have lower R-values compared to their faced counterparts.
Before choosing between faced and unfaced insulation for your home, consider various factors such as location, budget constraints and personal preferences.
Which type of insulation is best for your home?
When it comes to choosing between faced and unfaced insulation, there are several factors that can influence your decision. One of the most important considerations is where in your home you plan to install the insulation.
If you’re installing insulation in an area with high moisture levels, such as a basement or crawl space, faced insulation may be the best option. The vapor barrier on the facing helps prevent moisture from penetrating into walls and causing damage over time.
On the other hand, if you’re insulating an area that doesn’t require a vapor barrier or where moisture isn’t a concern, such as an attic or interior wall, unfaced insulation may be more appropriate. This type of insulation is often less expensive than faced options and allows for greater flexibility during installation.
Another factor to consider is local building codes and regulations. In some areas, faced insulation may be required by code for certain applications. Be sure to check with your local authorities before making a final decision on which type of insulation to use.
Ultimately, both faced and unfaced insulation have their advantages depending on the situation. It’s important to carefully consider all factors when deciding which type of insulation will work best for your specific needs.
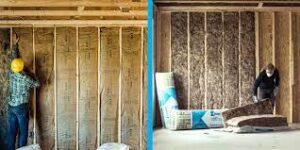
How to install faced and unfaced insulation
Installing insulation in your home can be a great way to reduce energy bills and make your home more comfortable. Faced and unfaced insulation are the two most common types of insulation available on the market. Here’s how you can install them:
Faced Insulation:
1. Measure the area where you want to install faced insulation.
2. Cut the insulation roll or batt with a utility knife to fit snugly between joists, studs or rafters.
3. Staple it into place with a staple gun, making sure that there are no gaps between pieces.
4. Continue until all walls, floors, and ceilings have been insulated.
Unfaced Insulation:
1. Measure the area where you want to install unfaced insulation.
2. Cut the unfaced batts or rolls down using scissors so they fit snugly in between joists, studs or rafters.
3. Insert each piece of batting into its designated space by pressing it up against one side before pushing it through completely onto another side.
4. Make sure there are no gaps left behind as this will compromise its effectiveness.
Installing either type of insulation requires careful attention to detail but is well worth it for increased energy efficiency and comfort levels within your home!
Conclusion
After weighing the pros and cons of both faced and unfaced insulation, it’s clear that choosing the right type depends on your home’s specific needs.
If you’re looking for a cost-effective way to insulate your attic or walls, then unfaced insulation might be the better option. It’s easy to install and provides excellent thermal performance.
However, if moisture is an issue in your home, then faced insulation may be more suitable as it helps prevent condensation from building up. Additionally, if you live in colder climates or near busy roads with heavy traffic noise pollution, faced insulation would definitely come in handy because its sound-dampening properties work wonders.
Ultimately, when deciding between faced vs unfaced insulation types for your home renovation project or new construction build-out; make sure to consult with a professional contractor who can help guide you through this decision-making process accurately based on your unique property attributes and budget constraints.